I have some projects that have been floating around my head for a while and as of yesterday nailed down 3 that I want to do/chronicle for various reasons. Some of the reasons are:
1. it's easy/cool enough to accomplish in the short amount of time I have between painting/cleaning/moving/eating/sleeping/taking care of the family when I can and ohh yeah, working.
2. relevant to my hobbies.
3. maximizes return on investment (ie. lowest cost for maximum FUNctionality)
4. I hope to put a smile on someone's face and save some of that hard earned coin, who doesn't like that?
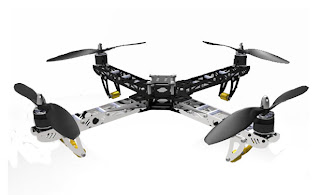
For this first project you will follow me on a journey to build a FPV quadcopter.
?????????????????
Let's start with a little explanation. FPV stands for First Person View. Basically you fly your aircraft remotely using a camera mounted to the airframe, seeing what an actual pilot would see. Pretty cool ehhh!
A quadcopter is an airframe (like a helicopter) that uses 4 rotors for movement in either an "X" or "+" configuration. For this exercise we will be in the X config because we will be mounting cameras.

This will be a learning exercise for both of us as the video and maybe even telemetry (checkbook allowing) transmit "Tx"/receive "Rx" is new to me.
Basic rundown of BillOfMaterials is as follows.
Essentials for basic quadcopter (money)
- airframe
- motors x4
- ESC or speed controllers x4
- receiver (OrangeRx R610 which I already have)
- battery
- quadcopter controller board
- transmitter (DX6i which I already have)
FPV components (money money)
- camera
- GoPro (for recording memories)
- video Tx
- separate battery for Tx
- video Rx
- Rx antenna
- display for viewing video (goggles or stand alone display)
This build will be broken into 2 parts. The first will be the build and trimming of a basic quadcopter ensuring proper flight characteristics and working out any bugs. I'll also tweak the design to afford a comfortable load carrying margin for the added weight of the FPV equipment. The second part will be the install of the FPV gear, debugging and finally some flight footage (yeahhhhh).
I'm excited because FPV is uber geeky cool. I feel like capturing some incriminating footage of someone ;) Also, this will be used to video the in-law's house in Guimaras, which was the initial intent of the failed flying footage posted earlier. Round 2 I hope will be better.
Next week I'll detail the build list and cost and hopefully have some parts on order. Most of the electronics will be coming from HobbyKing's international warehouse so 2 weeks transit is the norm.
See you next week.
-no$mike

No comments:
Post a Comment