Showing posts with label craft. Show all posts

Sunday, October 13, 2013

7 Craftgawker Make: Window Clings

I love Craftgawker.
I found this awesome tutorial via Pink Stripey Socks on how to make your own window clings using contact paper and paint pens.
I thought this would be a perfect project for Mr. to do. He says he's not creative...
huh... really.


 We added some Halloween gummy clings from Target to give a little more pop.

A perfect Daddy and Lala project.
Folks, you gotta check out Pink Stripey Socks for some awesomely crafty tutorials. Make sure to say hello for me!
***


Monday, August 12, 2013

23 Let's Make: Sunglass Masks

Hey there!
Let's take a little break from sewing (step away from the sewing machine) and let's do a little craftin', shall we? I had originally wanted to do this tutorial two years ago in October, but never got around to it. So I thought, "why not do it now in the summer?". Perfect! It's summertime, the kids are home, sunglasses are abundant and anytime is a good time to play make believe!
A couple years back, I was in the process of making Lala's Halloween costume. She was going to be an owl. The body of the costume was all sewn, but the face was my challenge. I remember being a kid and getting the costumes in a box. Remember those? The ones where it was a full body outfit (a one  piece) made out of plastic and it came with a mask that swallowed your face. Within 5 minutes of wearing the mask, your face is drenched in sweat and you begin to feel claustrophobic  because the holes for the nose and eyes were too small, remember?! So by the time you finished one block of trick-or-treating in your neighborhood, the mask was either in your candy bag or on top of your head. I even remember a couple of times, the mask ripping. Ahhh...good times.
Where was I? Oh yeah, Lala...
So I needed to create a mask that was going to be easy to make, easy to put on or take off and comfortable to wear. I was stumped. It wasn't until I saw a picture somewhere of the 2000 New Year's Eve glasses, you know the ones I'm talking about. Where your eyes are in the "00", between the "2" and  last "0". That's when it hit me... why not glue a mask to an old pair of sunglasses? And that's what I did! It was a huge success. Lala wore the mask with no problems and it got a lot of use. Even Sophia (my eldest) wore it to her school spirit day just last year. So if you're in the market for easy to make and easy to wear masks, pull up a chair and let's get craftin'!

***
SUPPLIES:
-sunglasses(any sunglasses will do)
-hot glue
-Fabri-Tac glue
-plain white paper
-pencil
-fine tip sharpie
-medium tip
-felt
-foam craft paper
-scissors
-needle and thread (optional)
-*velcro
*If you only have one pair of sunglasses, use velcro to attach to the masks. This way allows you to make multiple masks and only using one pair of sunglasses.
***
First, pop out the lenses and with a pencil and paper, trace around frame. With the black Sharpie, go over what you traced. This will be your template.
Take your template and placed it underneath a plain white paper. Draw your mask. Make sure to draw the eyes within the frames of your template. Once you draw your mask, you will then need to create pattern pieces for all the details on your mask. Once you've drawn out all the pieces, you will need to cut them out.
Place your pattern pieces on top of the felt and trace the pattern with a fine tip Sharpie. Cut out pattern pieces.
Take your main pattern piece (the face) and adhere it to the foam craft paper using Fabri-Tac glue. Carefully cut around the felt. Make sure to cut an opening for the eyes.
Adhere details to the face using Fabri-Tac glue. Allow glue to dry. If you're feelin' extra crafty, you can stitch on the details.
Apply hot glue to the frames of the sunglasses and carefully attach to the back of the mask. Clean up any glue boogers. Once glue is cool... it's show time!
Only able to sacrifice one pair of sunglasses? No problem!
Attach velcro to the sunglasses and to the back of the mask using hot glue. Let it set and get ready to be anyone or anything your heart desires! 
Can you guess what the last picture is?
Pretty easy to make, huh? Now it's your turn!
Make sure to share your creations over HERE. I'd love to see what you make!!!
***


Sunday, June 9, 2013

10 Portrait Mug Custom Order

Every Christmas I like to give handmade gifts for several reasons. ONE: We is po'. TWO: NOTHING compares to handmade. THREE: I'm pretty crafty so why not exploit my talents. FOUR: My family is narcissistic. HA! Scratch the last reason- I kid!!! So when I decided to paint everyone's portrait and give it a Victorian feel, it was a big hit.
Since then I have been thinking about offering portrait mugs in the shop. I wasn't sure how the product would take, if anyone would be interested in something like this. Also the logistics of it all... the cost per ceramic, the paint, the firing and my time has to be accounted for and all priced accordingly.  Until I got an email from a web-friend and pattern tester to my Miss Jenny Apron pattern, Rebecca.
After seeing my mugs via Flickr and blog, she wanted one of her boyfriend for his birthday.
A dapper young man.
Special requests: Victorian style, he has a fondness for cycling and is a HUGE fan of the Boston Red Sox.
His family are big and I mean BIG fans, so much so the family built a 1/3rd scale Fenway Park on their property. Yes, you read it correctly.
Fenway Park.
1/3rd scale.
On property.
Check it out HERE.
You can see how I work my magic on creating these mugs HERE.
I have seen other ways of painting or transferring designs onto mugs or other ceramic pieces using sharpie pens and I have yet to try them out.
Have you tried it?
If so, does it really work?
I'm going to try this out myself and see if I can create such intricate designs. If it works, I'll let you know and perhaps another tutorial may be in order. We shall see...
SO the question still lies, should I sell custom portrait mugs? Thoughts? Ideas? I'd love to hear.
***

P.S., Thanks Rebecca for letting me create something wonderful for you!!!

Monday, April 29, 2013

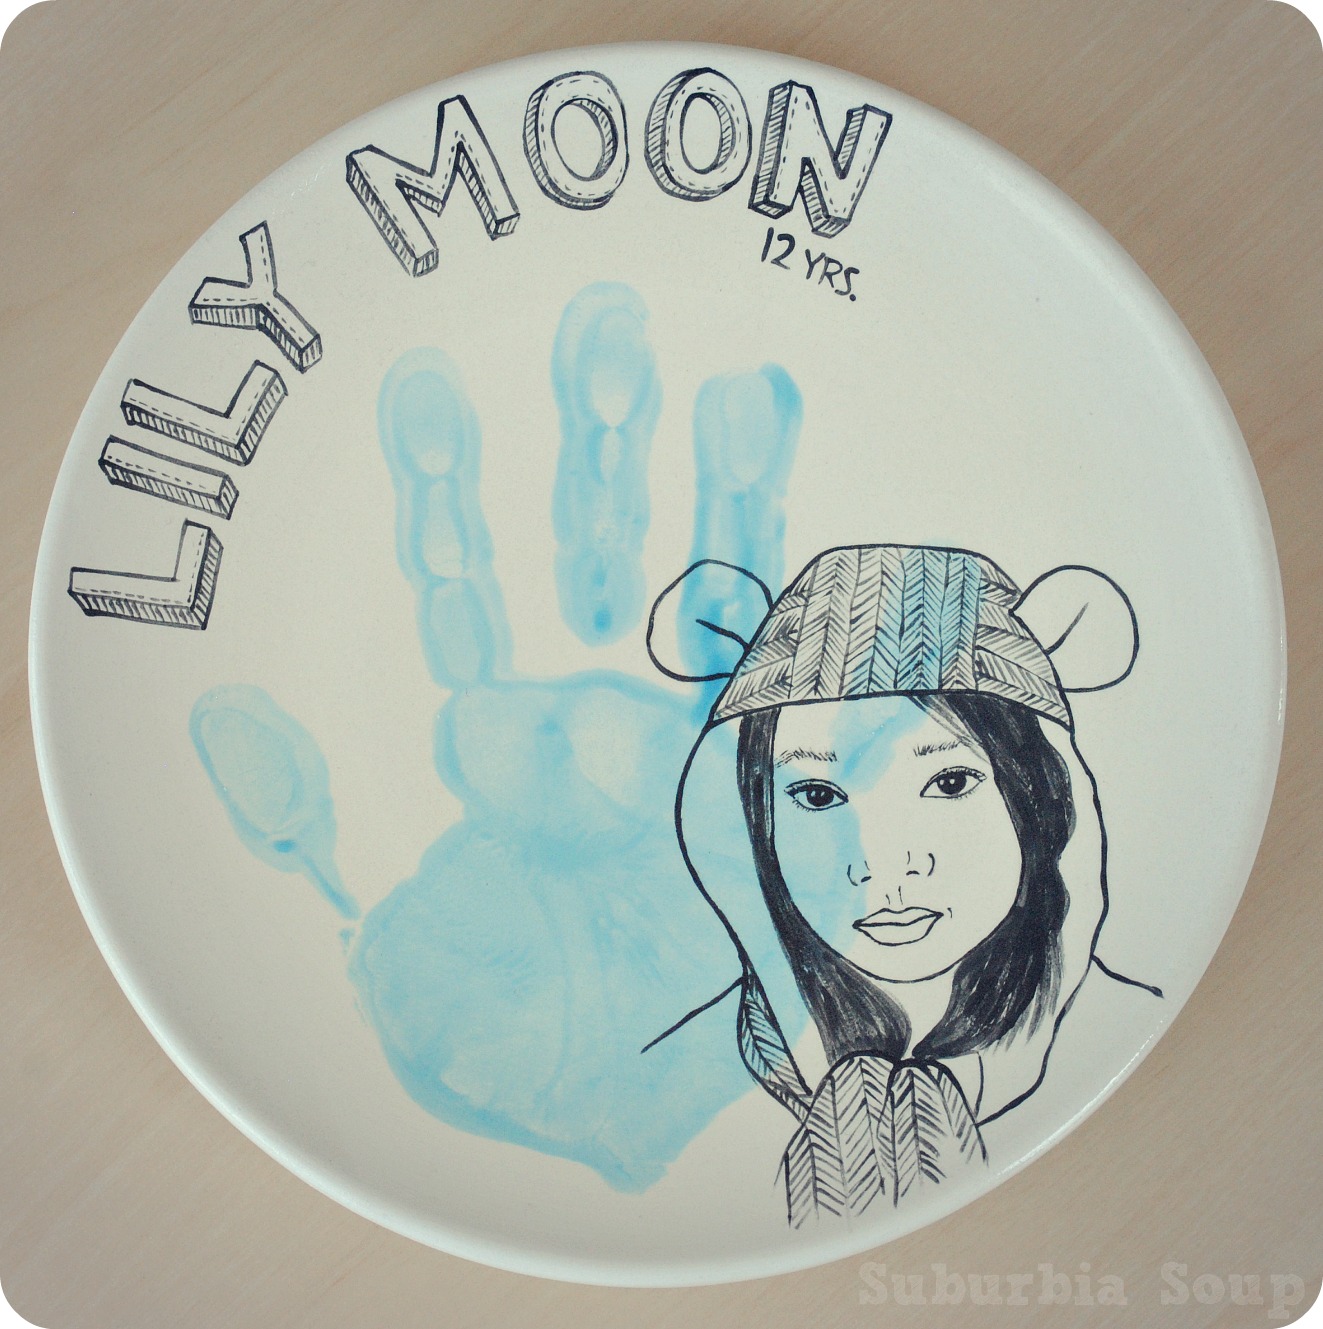
10 Portrait Plates: My Girls

I'm stepping away from the sewing machine for a sec to show you a little something I made for my girls.
It all started here, with Lala. I gave her a ceramic plate to paint, a plate for special treats and  for her to use on her birthdays to come. So when she was done painting I thought it would be nice to add her hand print, name and age. It looked cute! After all she did paint it herself and her tiny little hand is forever captured on the plate, but like most of my projects, it just needs one more little thing...
Just like the portrait mugs I made as gifts last Christmas (post HERE), I thought it would be fun to add her face.
It's finished and it pleases me.

It pleased me so that I did one for the older girls. After seeing all three together and how precious they are to me, I'm having second thoughts of letting them use it. That's what everyday dinner plates are for, or better yet... Dixie paper plates, right?!
***

P.S., I got another portrait mug to show you... my first custom order! Yup, I'm thinkin' of taking orders, but we'll talk more later...


Thursday, April 11, 2013

4 Covert Robin Part 2... to receive

               the covert robin button
I love pressies! Who doesn't?!
Mine arrived the other day and I was so excited. Liz from Fern's Frocks was my Covert Robin and look at her fabulous (NOT 1, but 2) gifts for moi.
*jumping and clapping*
Such a beautiful pillow, no?
Look closer...
Liz hand embroidered parts of the fabric. It's details like this when a person puts the time and love that speaks volumes. You can tell a lot from a person who even in the smallest gesture gives beyond what is expected. I love it Liz...
I truly do.
Lala literally took the pillow out of my hands and claimed it hers. She's a textural kinda girl and this is spot on.
As for gift #2, Liz painted a sweet little owl. Isn't he adorbs?!
She too has an affinity  for owls and she actually painted this along with a few others a while back knowing that one day, it was going to be a gift for someone...
ME!!!!
Funny how the universe works.
I introduced him to the others. First it was Earl...
then Yuki...
then Cookie (Cookie thought he was so tiny, she wanted to swallow him up). Before she could grab him, I quickly scooped him up an took him to meet the rest of the gang.
They were all fascinated and very welcoming.
Little owl was a bit overwhelmed and needed rest, after all he travelled quite a ways.
So I found him a nice quiet spot just for him, but he's not entirely alone...
He's got a friend in higher places!
***
WOW.
What a fun experience this has been. I met two wonderful women and gained two new friends. Thank you Mary Ann for allowing me to give and thank you Liz for allowing me to receive.
Until the next Covert Robin...
***

Tuesday, April 2, 2013

8 Another Friend

  Another late night and a sweet surprise for Lala and her gang.
For this doll I made the legs and arms thicker. I'm not sure if I  prefer this or thinner appendages. Mr thinks each one should be different, to fit their personality.
*shrugging*
Eh... we'll see.
This is what I should be doing right about now.
I adore her headdress. The shape and colors just fills me with warmth. I dunno how else to explain it...
Happiness?
Yes.
One area I need improvement is hand stitching. *ugh* Try to look beyond that part...I am still a Padawan in the realm of embroidery. How awesome would it be to have her headdress all fancy-schmancy embroidery? Maybe one day.
The first doll, I had used different felts. Lala loved biting her head (as you can see). A bit worn, but just as lovable as the when I first made her.
Little Clementine is very happy. No longer the lone tree. Another friend...another like her. So if you listen carefully, you'll hear not one, but two voices now. Softly humming in harmony as they happily count their fruits... together.
Who's next?
Sweet Mim has been waiting ever so patiently.
I can't wait to get started, but first...
SLEEP!
***

11 A New Friend

Last friday I decided it was time to revisit one of my old projects. Which was perfect timing since Easter was in a couple of days, I thought it would be extra special to make another doll for Lala.
What a dapper rabbit all decked out in stripes and bow tie. I'm very pleased with him... very much indeed!
In order to have him ready for Easter, I had to work well into the night. Yah baby... this is how I spend my Friday nights!
If you have been following me, you may of remembered these guys. I first made them just under 2 years ago so that Lala had company while she slept. They were much smaller with nubby arms and legs to make it easier for Lala's little hands to grab. That's Cleo on the left and Theodore on the right. I still haven't found a name for the new guy.
Any suggestions?
And here's the rest of the gang... Mim on far left and Clementine on the far right. You can read a little more about them on my old blog over HERE. Cleo was a little upset during the photo shoot. He had lost his scarf (actually Lala took it off) and he felt a bit naked without it. That's why he's hiding behind Mim.
Now it's time to move on to another! Clementine begged me to make a friend much like her (how could I possibly say no?), and Mim has shown interest as well, but she won't ask outright. I'll surprise her later.
I'm just about done with this next doll and I'll be back to introduce her to you.
***


Blogging tips