Showing posts with label baby. Show all posts

Thursday, January 30, 2014

9 KCW: Perri Pullover Remixed

Man-oh-man…
KCW is almost over?! 
I managed to squeeze in some sewing time and made this little number.
Fabric: quilted knit in charcoal grey
Infinity scarf: self drafted in lime green
Tights: Target
Leg warmers: self drafted in heather grey ribbed knit
Boots: Palladium
I made a few modifications. First, I drafted a raglan sleeve. Second, I omitted the pockets. Third, I shortened the length in the back. Fourth, I made the neck band a little wider. The neckline came out a bit different as to what I was expecting. Food for thought next time. I love the quilted fabric. SO cute, no? It's perfect for this design.
KCW isn't other yet and if I play my cards right, I just might be so lucky to sew, take a pic and post by the end of this sewing series. We shall see…
I dunno…
My boss doesn't seem too happy when I dip into playtime.
***
***
Have a great weekend, folks!

Tuesday, January 28, 2014

38 Roots Sewing Series: Philippines


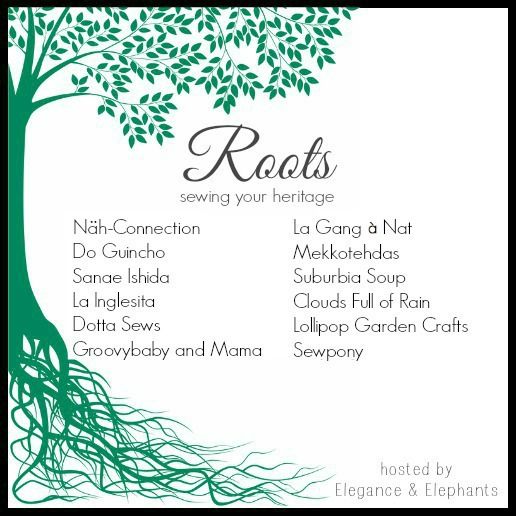
Heidi of Elegance and Elephants has created a new sewing series to showcase several bloggers' cultural inheritance called, Roots. 
Have you been following? 
Oh.My.Goodness.
From Finland to Japan, what a trip it has been! Now let's hop on over to a country of over 7,000 islands and over 170 dialects, the Philippines. When I initially signed up, I had wanted to include my husband's Chamorro (aka: Guamanian) culture, but as I got deeper into research, I decided to just focus on my Filipino heritage (hey man… I'm the one sewing!). 
When it comes to Filipino traditional dress, there are several depending on location, but there is one that is significant to my heritage and it's the kimona and the patadyong. This outfit originated from the Visayas (where my family is from), first worn by women during harvest season, but soon became more common in everyday wear and even in formal settings. The kimona is a sheer blouse made from pineapple fibers, to be worn over a camisole. The patadyong is very similar to a sarong in which a cotton rectangular fabric is wrapped around the waist. The outfit is often accessorized with a "scarf" which is a small rectangular piece that rests on one shoulder.
Via internet
I wanted to make the outfit modern, wearable and most importantly comfortable for Lala. In my search for fabrics, I found this gorgeous white cotton fabric with floral embroidery at JoAnn's. It has just enough sheerness to give the option of either layering with a camisole (tank top) or not.  I drafted a pattern using pattern K from Happy Homemade Sew Chic Kids as my foundation. I omitted the front and back yoke, widened the neckline wand added a light gathering, extended the sleeves and moved the opening to the back side. 
I am in love with the sleeves. So light and wispy!
For the patadyong, I needed this to be "Lala friendly", meaning that it had to be uber comfortable and easy to put on or take off (yeah… we're still in the potty training phase). My original thought was to make a wrap skirt, but my niece (who was happening to hang out with me at the time) said, "Hey Auntie… why not make a skort?". Brilliant! Using the same sewing book, I used pattern D as my base and added a flap to give it that "sarong" look. Traditionally, the patadyong is made with a floral or striped fabric, but to give it a more updated look, I used Parson Gray Vagabond for Free Spirit. It still has that ethnic vibe, with a modern appeal.
Elegance & Elephants
And so the journey through my heritage ends here. It was a lot of fun to reflect and learn more about my culture through this sewing adventure. I am so-so happy to have shared this with you and I hope it inspires you to create something for your little one, and if you do, Heidi has a sew along link up along with an AH-MAZING giveaway HERE.
Check it out and good luck!
***

Thank you, Heidi for having me!

Monday, January 20, 2014

15 Little Betty Blog tour

Hey you!
I'm poppin' in to share another great pattern just released by the lovely and talented Suz from Sewpony, the Little Betty Top.
Pattern: option A
Fabric: Holli Zollinger for Spoonflower
If vintage and great design is what you're looking for in a little girls' pattern than look no further, folks. Just look at the picture. Need I say anymore?!
***
Now before we progress, let me digress…
Let me share a wee story with you.
Here is my first Little Betty top(above). I wanna share with you the repercussion of measuring your growing child and not sewing the outfit almost immediately.
GROWTH SPURT.
Now I measured Lala and wasn't able to get started right away due to motherly/wifey obligations and work and the holidays.  So when it came time to sew, I was just so excited to get going that without even thinking of measuring again, I sewed this baby up and tried it on Lala.
TRIED.
Poor girl. She had a little panic attack when I struggled to put it on and when I finally got it on, her buddha belly was accentuated to the Nth degree. I couldn't help but laugh and smother her belly with kisses.
So back to the sewing board to make Little Betty Top #2(and subsequently top #3 shown at the top of post)…
Fabric: Fox Family(main fabric) and Popcorn on Ecru Ribbed Knit(trim) from Girl Charlee
Thank God, I had extra fabric to make the same top. Only this time I used a different ribbed knit for the trim.


The Little Betty Top pattern has three options to choose from: long sleeve (as seen here), short sleeve and sleeveless and if you've been following the blog tour, the possibilities  are endless. How about a Little Betty Dress? Uh-huh, oh yeah… I'm already planning it!
The instructions are very easy to follow with tons of pictures and Suz's has a special going during the blog tour in her shop HERE. Just use the code: BETTYTOUR1 upon cheek out and get $1 off! Honestly, the price of the pattern is already a steal and the little discount is just icing on the cake.
If you haven't already, please make sure to stop over to Shino's blog and see her version of the Little Betty(HERE).
Have a great Monday, folks!
***


Tuesday, October 22, 2013

24 Hoodie Scarf: A Revised Ear Tutorial

Hi folks!
You may have seen my 'new and improved' hoodie scarf over at Tasha's blog (HERE) and I thought I'd share with you the changes I made to make the perfectly placed ears. Nothin' like a good set of ears, no? 
If you haven't read the original tutorial, please do so as this tutorial is a supplement. For hoodie lining, scarf and supplies  please refer to the original post(HERE).
Alrighty...
Let's begin!
Above are the hoodie scarf pattern pieces you will need (scarf pattern not shown). Pay particular attention to the cutting directions for the 'center strip' piece.
For the main fabric center strip piece, you will need to add 3/4" to the length. Measure 3" from either short end of the strip and cut. This short strip should be the same length as the top short edge of your 'front side pieces'.
With right sides together, stitch your short strip to the front side pieces.
Your front hoodie scarf piece should look something like the diagram above.

Next, follow the directions in my previous tutorial (HERE) to make the ears. From the center of the back edge of the front hoodie scarf, measure the distance you would like your ears to be apart. ***A 2" distance in-between worked best for me, but you can increase or decrease the measurement to better suit you.*** Pin and baste in place with right sides together. Set aside.
Starting from the top edge of the side pieces, take your long center strip of main fabric and with right sides together, stitch in place. This may be a bit tricky for some, so take your time! Trim off any extra fabric from the center strip.
With right sides together, stitch your front piece to the back piece. Flip front piece over.
Flip ears up and press seam allowance forward. Topstitch about 1/8" from the seam to secure the seam allowance in place. This step will help keep the ears upright.
Yahoo!
You have yourself a perfect set of ears!
For the remaining steps, just hop over to the previous tutorial (HERE)and you got yourself one purrrr-fectly sweet hoodie scarf!
Make someone happy... make a hoodie scarf!
***
P.S. Don't forget to share your creations on our Flickr group (HERE). 


Monday, August 19, 2013

21 Hanami Pattern by Straight Grain

Hello folks!
Let's start the week with a new pattern by none other, An from Straight Grain.
*applause*
This woman is amazing, but I'm sure you already knew that! I just love her approach to little girls' clothing... simple and feminine. It's refreshing to see her timeless designs in an otherwise trendy world of fashion. So when An asked for pattern testers for the Hanami pattern, I pounced on the chance! I mean look at this pattern... how adorbs is this?!
The pattern has the option of a dress or top, crossed back or zipper, collar or no collar and ruffle sleeve or tulip flutter sleeves. I opted for crossed back top with tulip flutter sleeves. Crazy options, ay?
I sewn up a size 3Y which is equivalent to a 3T here in the US.
Isn't the back darling? This is what got me hooked. If I was to see this on a hanger, my first thoughts would be the back being the front and I honestly would've thought nothing more of it, but it's not.
 THIS is the back. 
Now, I have a little secret.
I don't do zippers.
I know-I know... it sounds ridiculous and especially coming from someone who has sewn for such a long time, but I just don't care for it. I'm a bit intimidated by it actually but if my buttonhole maker keeps misbehaving, I just might give in and start sewing zippers.
I added contrasting fabric to the sleeve lining... a cute little surprise!
 The fabric is the Briar  Rose collection by Heather Ross (loooove!) and the buttons are from a local fabric shop (they have a big chest full of buttons).
Now here's what I did differently.
I made the top into a wrap versus a pull over with snaps on the inside. The reason I did this was because Lala is... how should I say... slightly above average in the weight category, so when I initially made this into a pullover and tried to put it on, it was anything but easy. I am loving this change. LOVE-LOVE-LOVE! And with the overlapping of the ruffled flounce just adds to the cuteness factor.
The top took less than a day to make and An's step by step instructions along with great photos made the whole sewing experience a pleasant one. You could probably get by just by looking at the photos!
Overall, this pattern is an A+ in my book. Easy to follow instructions, great photos, a plethora of style options and a classic design... how can you go wrong? Check it out for yourself! The pattern is available HERE. If you're still not convinced, check out all the other bloggers who tried the pattern starting today and throughout the week.
You too will soon agree that the Hanami pattern is 'ichiban'!!!
***

Thursday, August 8, 2013

22 Tumblin' Along


When Rachael invited me to do the blog tour, my mind raced with endless possibilities of modifying the Tumble Tee. I thought of adding fun pockets like the pouch I did HERE and I thought of altering the sleeves to make it like a dolman style dress, but honestly... when you have a great basic design, why change it?
So I didn't.
And I'm happy.
The fabrics were from my last trip to L.A.'s fabric district.
I had other plans for these fabrics. The floral was intended for the older girls and the stretch lace was for a different top for Lala. Change one-change two and here we are!
The pattern was quick and easy. I think the only hard part was deciding whether to make it a top or a dress. Perhaps the next Tumble Tee will be a modified rendition and yes... there will be a next!
So have you made a Tumble Tee, yet? Haven't got the pattern?
Say wha?!
Do I have a goody for you!
Leave a comment here no later than August 16th, the winner will be announced on the 18th and Rachael will send the lucky duck their very own Tumble Tee pattern.
Easy-schmeasy!
***
So keep tumblin' with us and make sure to visit all the other lovely blogs on the tour!


***

Monday, July 15, 2013

16 Compagnie-M Pattern Test

Marte from Compagnie M was calling out for pattern testers for this fabulous frock.
I jumped at the chance and was one of the lucky ducks to to get first crack.
 The pattern was fairly easy to sew. It had plenty of pictures which is a big plus for me (i'm a picture kind of gal) and the pattern consists of 5 pieces which is another plus for me (too many pieces = too much work). The only difficulty was figuring out the metric conversions, but working with Japanese patterns for so long, it was really nothing at all.
Overall, I give the pattern two thumbs up! A great pattern!!!
I remember in Marte's previous post, she was trying to find a name for this blouse. Wanting to have more reader participation, she asked, "What do you think?". There were a few readers who mentioned the idea of naming it after a place or city and I couldn't agree more. 
Now the fabric you see here was by chance. I was digging through my stash, trying to find the right one. It came down to two options, but I wasn't completely sold. So I dug deeper... lo and behold, deep in recesses of my fabric bins, I found THE fabric!
Yummy, no? The fabric is, Etchings by 3 Sisters for Moda.
100% quilting cotton... 100% FAB-U-LOUS!!!
As I mentioned earlier, this is a great pattern, but that doesn't mean I'm not going to change it up a bit.
I widened the bottom opening at about 3/4", giving the blouse a slight A-line cut (Lala needed a little more tummy room).
I then gave the hem a soft curve both front and back
and did a soft inverted curve along the sides.
VERY minor details and almost unnoticeable, it was more of necessity to accommodate ones "healthy" build. *wink*
In the midst of all the children sewing hullabaloo, I'm sure you have one word on your mind...
"WHEN".
Soon, my pretties! Very soon! In the meantime, be sure to visit Marte's place for more inspiration and FREE patterns, yes... FREE!
Check it out!
***


Blogging tips