Saturday, December 6, 2014

0 and the winner is...

Bonnijean Marlowe Marley!!!
Congratulations, Bonnijean!
Thank you soooo much for everyone's participation and lovely comments!
***

Wednesday, November 26, 2014

39 Just for You Blog Hop & Giveaway!

Hello sweet friends!
My-oh-my, it has been too long.
As if life wasn't crazy enough, I had to make a decision and step away from my beloved cyberworld and focus on other aspects of my life. As with most of you it's in the blood- crafting, sewing, creating. I may wander off from time to time, but I will always come back to connect and share
with you.

Have you seen this book?
A wonderful book of 24 amazing sewing projects for who? Why YOU of course!
Caroline and Sarah invited me to take part in this amazing opportunity to be amongst some amazing Indie designers and bloggers to share one of my most popular tutorials, the Hollywood Scarf (AKA: hoodie scarf). The original design was geared towards the wee ones, but why should they have all the fun?!

In the book you will be able to not only make a scarf in cozy fabrics for the colder weather, but also in soft light fabrics for any day of the year AND… it can be reversible! Say whaaat?!

Here I chose to make mine with a linen cotton blend and flannel fabrics. So quick and easy to make and this would make a perfect gift for that fashionista in your life!

Don't have the book? *GASP*
Good heavens!
Enter below to win a book for yourself. 


a Rafflecopter giveaway
Just leave a comment (only ONE comment, please) no later then December 5th and one lucky duck will be chosen on December 6th! AND if that wasn't enough… how about some yummy fabric to go with your book? Hop over to SewCanShe blog HERE and enter a chance to win that as well.
Want see what other projects are in the book and by who? Take a looky below. Soooo many amazing projects
JUST.
FOR.
YOU.
Thank you, Caroline and Sarah!
Happy Thanksgiving everyone!


Wednesday, February 12, 2014

0 The Eighties Called...

This goes out to all my peeps who donned the Members Only jackets and spent hours teasing their hair…

Thursday, January 30, 2014

9 KCW: Perri Pullover Remixed

Man-oh-man…
KCW is almost over?! 
I managed to squeeze in some sewing time and made this little number.
Fabric: quilted knit in charcoal grey
Infinity scarf: self drafted in lime green
Tights: Target
Leg warmers: self drafted in heather grey ribbed knit
Boots: Palladium
I made a few modifications. First, I drafted a raglan sleeve. Second, I omitted the pockets. Third, I shortened the length in the back. Fourth, I made the neck band a little wider. The neckline came out a bit different as to what I was expecting. Food for thought next time. I love the quilted fabric. SO cute, no? It's perfect for this design.
KCW isn't other yet and if I play my cards right, I just might be so lucky to sew, take a pic and post by the end of this sewing series. We shall see…
I dunno…
My boss doesn't seem too happy when I dip into playtime.
***
***
Have a great weekend, folks!

Tuesday, January 28, 2014

38 Roots Sewing Series: Philippines


Heidi of Elegance and Elephants has created a new sewing series to showcase several bloggers' cultural inheritance called, Roots
Have you been following? 
Oh.My.Goodness.
From Finland to Japan, what a trip it has been! Now let's hop on over to a country of over 7,000 islands and over 170 dialects, the Philippines. When I initially signed up, I had wanted to include my husband's Chamorro (aka: Guamanian) culture, but as I got deeper into research, I decided to just focus on my Filipino heritage (hey man… I'm the one sewing!). 
When it comes to Filipino traditional dress, there are several depending on location, but there is one that is significant to my heritage and it's the kimona and the patadyong. This outfit originated from the Visayas (where my family is from), first worn by women during harvest season, but soon became more common in everyday wear and even in formal settings. The kimona is a sheer blouse made from pineapple fibers, to be worn over a camisole. The patadyong is very similar to a sarong in which a cotton rectangular fabric is wrapped around the waist. The outfit is often accessorized with a "scarf" which is a small rectangular piece that rests on one shoulder.
Via internet
I wanted to make the outfit modern, wearable and most importantly comfortable for Lala. In my search for fabrics, I found this gorgeous white cotton fabric with floral embroidery at JoAnn's. It has just enough sheerness to give the option of either layering with a camisole (tank top) or not.  I drafted a pattern using pattern K from Happy Homemade Sew Chic Kids as my foundation. I omitted the front and back yoke, widened the neckline wand added a light gathering, extended the sleeves and moved the opening to the back side. 
I am in love with the sleeves. So light and wispy!
For the patadyong, I needed this to be "Lala friendly", meaning that it had to be uber comfortable and easy to put on or take off (yeah… we're still in the potty training phase). My original thought was to make a wrap skirt, but my niece (who was happening to hang out with me at the time) said, "Hey Auntie… why not make a skort?". Brilliant! Using the same sewing book, I used pattern D as my base and added a flap to give it that "sarong" look. Traditionally, the patadyong is made with a floral or striped fabric, but to give it a more updated look, I used Parson Gray Vagabond for Free Spirit. It still has that ethnic vibe, with a modern appeal.
Elegance & Elephants
And so the journey through my heritage ends here. It was a lot of fun to reflect and learn more about my culture through this sewing adventure. I am so-so happy to have shared this with you and I hope it inspires you to create something for your little one, and if you do, Heidi has a sew along link up along with an AH-MAZING giveaway HERE.
Check it out and good luck!
***

Thank you, Heidi for having me!

Monday, January 20, 2014

15 Little Betty Blog tour

Hey you!
I'm poppin' in to share another great pattern just released by the lovely and talented Suz from Sewpony, the Little Betty Top.
Pattern: option A
Fabric: Holli Zollinger for Spoonflower
If vintage and great design is what you're looking for in a little girls' pattern than look no further, folks. Just look at the picture. Need I say anymore?!
***
Now before we progress, let me digress…
Let me share a wee story with you.
Here is my first Little Betty top(above). I wanna share with you the repercussion of measuring your growing child and not sewing the outfit almost immediately.
GROWTH SPURT.
Now I measured Lala and wasn't able to get started right away due to motherly/wifey obligations and work and the holidays.  So when it came time to sew, I was just so excited to get going that without even thinking of measuring again, I sewed this baby up and tried it on Lala.
TRIED.
Poor girl. She had a little panic attack when I struggled to put it on and when I finally got it on, her buddha belly was accentuated to the Nth degree. I couldn't help but laugh and smother her belly with kisses.
So back to the sewing board to make Little Betty Top #2(and subsequently top #3 shown at the top of post)…
Fabric: Fox Family(main fabric) and Popcorn on Ecru Ribbed Knit(trim) from Girl Charlee
Thank God, I had extra fabric to make the same top. Only this time I used a different ribbed knit for the trim.


The Little Betty Top pattern has three options to choose from: long sleeve (as seen here), short sleeve and sleeveless and if you've been following the blog tour, the possibilities  are endless. How about a Little Betty Dress? Uh-huh, oh yeah… I'm already planning it!
The instructions are very easy to follow with tons of pictures and Suz's has a special going during the blog tour in her shop HERE. Just use the code: BETTYTOUR1 upon cheek out and get $1 off! Honestly, the price of the pattern is already a steal and the little discount is just icing on the cake.
If you haven't already, please make sure to stop over to Shino's blog and see her version of the Little Betty(HERE).
Have a great Monday, folks!
***


Monday, December 9, 2013

2 Louisa Dress Pattern Winner

Diana Hansen!!!
Congratulations, Diana! Expect your sweet surprise via email, compliments from Marte of Compagnie M.
***
Thank you everyone who participated and your lovely comments!
***

Thursday, December 5, 2013

25 Louisa Dress by Compagnie M

Hey there!
Have you seen Marte's latest pattern release? It's absolutely adorable! When Marte first posted about this dress (HERE), I was smitten and when I was invited to be part of the pattern tour, I was over the moon. 
Oh lucky-lucky me!
The dress is fully lined with a ginormous pocket in the front (perfect for little gatherers) and the back has an invisible zipper. Speaking of zipper…
guys
this is my first attempt working with a zipper. Shocked? I am. You would think someone who has sewn for many years would be able to sew zippers in her sleep, but truth has it, I was afraid of them. What the heck was wrong with me?!!! Now I wanna sew zippers on everything!
The pattern came together smoothly. The directions and photos were easy to follow and it took me one afternoon to whip this up. What's really nice are the different options to create different looks and the pattern offers sizes 1yr to 10 yrs old. A whole lotta bang for your buck!
Usually I would make slight changes to a pattern to fit Lala properly or deviate from the instructions, but not this pattern. It's a really great pattern.
The fabric is Bark & Branch by Eloise Renouf, for Cloud9 Fabrics in organic cotton in Autumn Wonderland and Passing Clouds Gold. I purchased the fabric from Fabricworm. A great shop, btw.
Marte is offering a 10% discount on her new pattern. The code is Louisa10off and is valid until December 7th. Marte is also offering a combo pack of the Mara and Louisa dress for $16.31 (12 euros). Just hop over to her pattern shop (HERE).
If the discounts aren't enough, how about a giveaway?
 Feelin' lucky???
Just enter below for a free Louisa Dress pattern.
***
Thank you so much Marte for having me on the tour!
***

a Rafflecopter giveaway

Thursday, November 14, 2013

22 Pattern Anthology Tour: Juliet Capelet Remix

Hey folks!
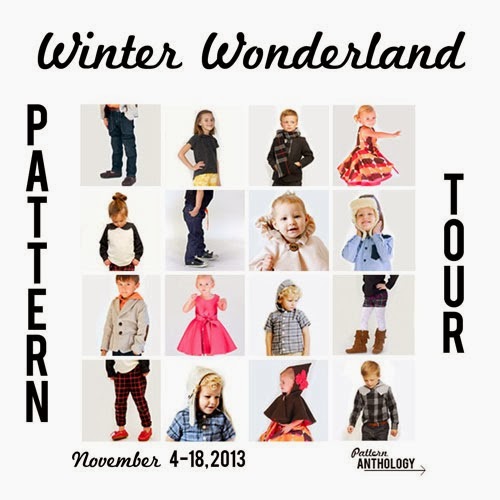
Pattern Anthology has done it again, four amazing Indie designers, eight great patterns and endless styling possibilities for your little fashionistas. Winter Wonderland is their latest installment and if you have been floating around the blogosphere, chances are you have seen some of the beautiful creations from some pretty talented sewists. To be honest with you, I am humbled and in awe to be part of this tour.
I was VERY lucky to have the opportunity to be part of the Pattern Anthology Tour and my pattern choice was the Juliet Capelet from none other, Kate from See Kate Sew. The pattern is easy to follow and was a quick sew. A great project for those who seek instant gratification with "WOW" factor. 
When I saw the pattern it was a no brainer. After making a few hoodie scarves with ears, I just had to give it a try on this baby. 
I had a little bit of the sherpa fabric left from my last project {HERE} to use for the back of the ears.  Let no sherpa fabric go to waste... that would be sacrilege!
If you ever plan to add ears on your Juliet Capelet, be sure to check out my tutorial for perfect ear placement {HERE}.
The outer fabric is a medium weight wool blend and the lining is yummy fleece fabric. The fabric combo will keep her nice and toasty during the colder weather. I added 3 inches to the length for two reasons. ONE: the longer it is- the more wear she can get out of it and TWO: it'll keep her warm(er) on chilly days.
When Lala first tried the capelet, she was lost. She kept stretching out her arms searching for the sleeves and when she realized there wasn't any, it was game over. She wanted this thing off and off quickly. No sleeves=no wear.
So what do you do when a capelet gives you no sleeves? Just add buttons!
Now Lala was on board.
Happy.
Toasty.
Cute.
Are you ready to get your sewing on? Make sure to go to the Pattern Anthology site {HERE} and get your own Winter Wonderland Collection. Folks, it's a great collection and you will not be disappointed.
***


Sunday, October 27, 2013

21 KCW: Sherpa Raglan

 Well this past week was an epic fail for my KCW projects 
*boo*
I've been working more hours which leaves sewing time next to nil. It sucks. Talk about having serious sewing withdrawals... anxieties, insomnia, bolts of fabric dancing in my head...
*sigh*
At least I managed to get one project done. Better than none, right?! Right.
 This picture pretty much sums up how much Lala loves this dress.
My inspiration was this lovely via Pinterest.
I used pattern 3/5 from Simple Design Boys and Girls Clothes (you can get it HERE) as my foundation and it worked like a charm.
The sleeves are a super-uber soft sherpa like stretchy knit I found at one of my local fabric shops,  the main fabric is bamboo terry knit (mmmm.... yummy) and the cotton ribbing is from one of my L.A. trips. 
 I made it a bit big so that Lala can get a lot of wear out of it. I'm guessing this will last well into spring. Stretchin' that dollar bill, yo!
I'm very curious how the sherpa will hold up after a gazillion washes. If it holds up, I'm buyin' me some more... sherpa for everybody! What do ya think... sherpa underwear? No?
*chuckle*
Maybe not a wise choice.
***


Tuesday, October 22, 2013

24 Hoodie Scarf: A Revised Ear Tutorial

Hi folks!
You may have seen my 'new and improved' hoodie scarf over at Tasha's blog (HERE) and I thought I'd share with you the changes I made to make the perfectly placed ears. Nothin' like a good set of ears, no? 
If you haven't read the original tutorial, please do so as this tutorial is a supplement. For hoodie lining, scarf and supplies  please refer to the original post(HERE).
Alrighty...
Let's begin!
Above are the hoodie scarf pattern pieces you will need (scarf pattern not shown). Pay particular attention to the cutting directions for the 'center strip' piece.
For the main fabric center strip piece, you will need to add 3/4" to the length. Measure 3" from either short end of the strip and cut. This short strip should be the same length as the top short edge of your 'front side pieces'.
With right sides together, stitch your short strip to the front side pieces.
Your front hoodie scarf piece should look something like the diagram above.

Next, follow the directions in my previous tutorial (HERE) to make the ears. From the center of the back edge of the front hoodie scarf, measure the distance you would like your ears to be apart. ***A 2" distance in-between worked best for me, but you can increase or decrease the measurement to better suit you.*** Pin and baste in place with right sides together. Set aside.
Starting from the top edge of the side pieces, take your long center strip of main fabric and with right sides together, stitch in place. This may be a bit tricky for some, so take your time! Trim off any extra fabric from the center strip.
With right sides together, stitch your front piece to the back piece. Flip front piece over.
Flip ears up and press seam allowance forward. Topstitch about 1/8" from the seam to secure the seam allowance in place. This step will help keep the ears upright.
Yahoo!
You have yourself a perfect set of ears!
For the remaining steps, just hop over to the previous tutorial (HERE)and you got yourself one purrrr-fectly sweet hoodie scarf!
Make someone happy... make a hoodie scarf!
***
P.S. Don't forget to share your creations on our Flickr group (HERE). 


Blogging tips